

It’s summer time and we are hopping with some fabulous companies in the Summer Road Trip Partner Hop with Spellbinders.
Stampendous Stamps is hopping all three days with some fabulous summer inspiration from the design team and on Wednesday two of our designers will be featured a tutorial with some new Spellbinders products! How fun is that!
Prizes! Spellbinders is having a great giveaway during this hop with three daily winners and one grand prize winner! Check out the details here.
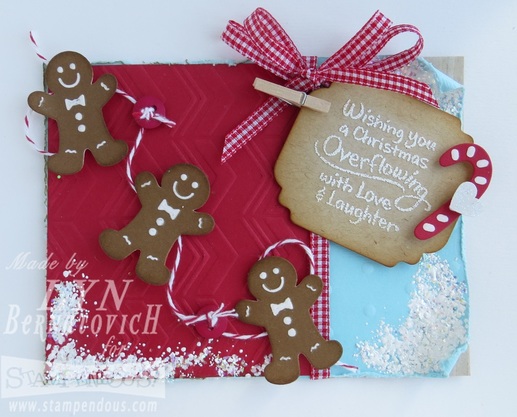
My final project is a Christmas card. I love these little gingerbread men dies. They are just too cute! Read further to see how to use the Spellbinders Die D-Lite Shapeabilities
Stampendous Stamps is hopping all three days with some fabulous summer inspiration from the design team and on Wednesday two of our designers will be featured a tutorial with some new Spellbinders products! How fun is that!
Prizes! Spellbinders is having a great giveaway during this hop with three daily winners and one grand prize winner! Check out the details here.
My final project is a Christmas card. I love these little gingerbread men dies. They are just too cute! Read further to see how to use the Spellbinders Die D-Lite Shapeabilities
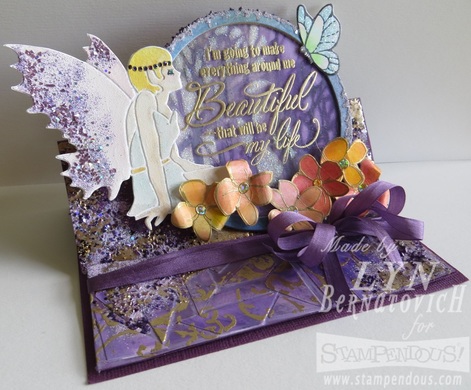
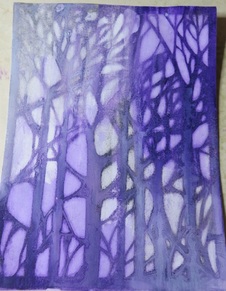
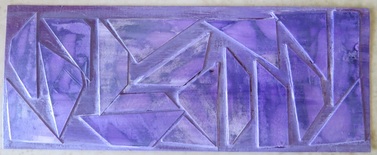
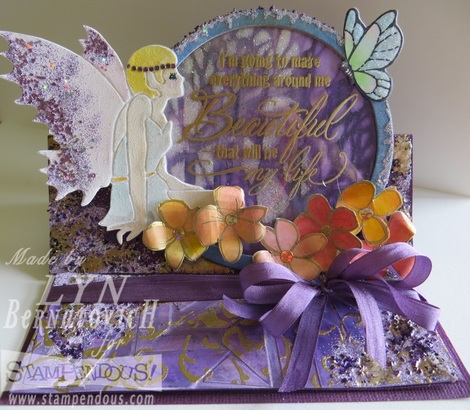
Two Dreamweaver Stencils were dry embossed with Bazzil papers: Chevron Background and Big Dots
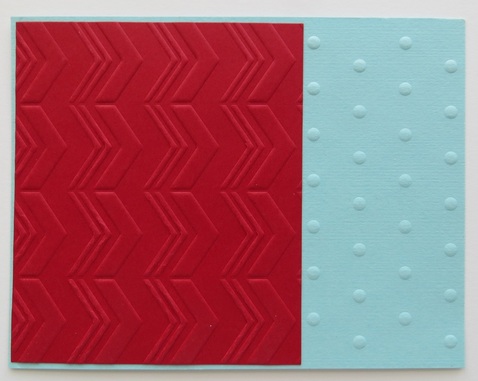
Dry Embossing using a Dreamweaver stencil looks like this. Here I used two stencils to create texture and additional interest.
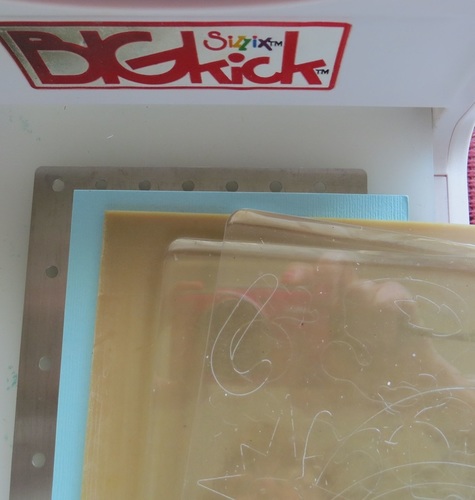
Dry embossing a Dreamweaver stencil requires a stacked 'sandwich.' Here's the order of the layers using my Sizzix Big Kick: Platform (no tabs), stencil, cardstock, rubber mat, 2 cutting plates.
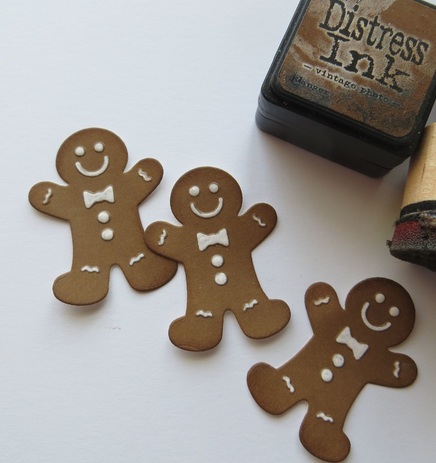
Step 3 stenciling is done and all they needed was a little brown edge. They look good enough to eat!

Step 3 after embossing and flipping over the die, you can see how it becomes a stencil. Here I started coloring in the raised areas with the Uniball pen.

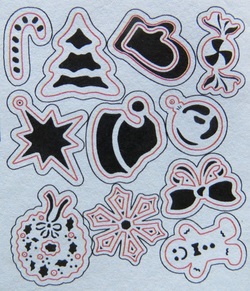
The Spellbinders Die D-Lite Shapeabilities (SKU PHS-511) look like this. Aren't they so cute?
Here's a quick rundown about working with these dies. There's also a useful video on YouTube by Kazan Clark of the Spellbinders Imagination Team that helped me tremendously.
There are 3 steps to creating a finished Shapeabilities diecut shape. My directions use the Spellbinders Grand Caliber machine.
1. Diecutting: Lay the die near the edge of A Plate with the cutting side face up. Lay a piece of wax paper over the die (very important step!). Lay your cardstock over the wax paper. Place Cutting Plate C over the paper and diecut.
2. Emboss: Remove Cutting Plate C. Remove the negative portion of the diecut paper and leave the rest in place inside the die. Place the rubber mat over the die. Place the Plate B over the rubber mat and crank through the machine.
3. Stencil: Remove the Plate B and rubber mat. Pop out the embossed diecut piece and remove the wax paper. Return the diecut piece to the diecut. Flip it over and lay it on the work surface. You will see the raised (embossed) areas only through the 'stencil.' Now you'll decide how you're going to decorate the raised areas. For both the gingerbread men and candy cane, I colored the raised areas with a Coconut White Uniball Signo Pen and it worked great through the raised areas of the stencil!
It's just a matter of assembling the card beginning with a 5-1/2x4-1/4 inch kraft cardstock panel (A Muse). I dry embossed it using a Dreamweaver Plaid stencil. The red and blue panels were affixed and then edge distressed (Prima Tool) before affixing onto the kraft cardstock with 3M Scotch 1/4" ATG tape. The gingham check May Arts ribbon was tied in a double bow.
The red/white cording (May Arts) was coiled over the red chevron with a few buttons (A Muse) threaded onto the cording. The gingerbread men were mounted over the cording with 3M foam mounting tape. On the right side, a diecut label (my stash) was embossed with Stampendous white embossing powder onto kraft paper (A Muse) and distressed with Vintage Photo ink (Ranger) and held in place with a tiny clothespin (A Muse). The Spellbinders candy cane was mounted onto the tag and a sweet punched heart (Marvy) on glitter paper (craft store) was mounted onto the candy cane. The edges were curled up and Stampendous Encrusted Jewels were heated from underneath to add extra pizzaz.
I hope you enjoyed my Christmas card today! Before you go, I'd love you to leave me a comment. Thanks for stopping by!
Stampendous Blog
Tenia Nelson
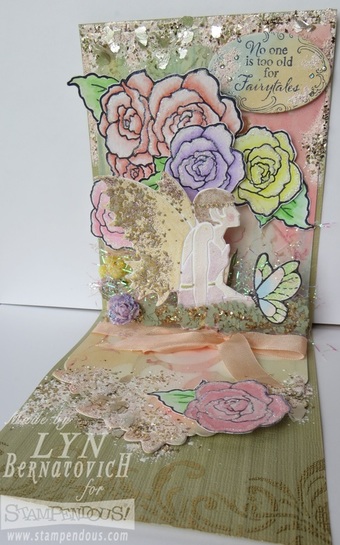
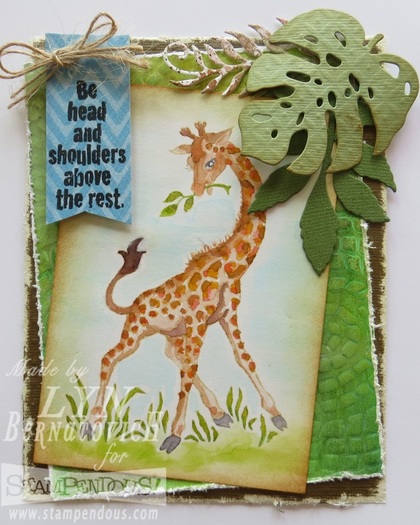
Lyn Bernatovich
Laura Drahozal
Janelle Stollfus
Lea Kimmel
Asia King
Spellbinders Blog
There are 3 steps to creating a finished Shapeabilities diecut shape. My directions use the Spellbinders Grand Caliber machine.
1. Diecutting: Lay the die near the edge of A Plate with the cutting side face up. Lay a piece of wax paper over the die (very important step!). Lay your cardstock over the wax paper. Place Cutting Plate C over the paper and diecut.
2. Emboss: Remove Cutting Plate C. Remove the negative portion of the diecut paper and leave the rest in place inside the die. Place the rubber mat over the die. Place the Plate B over the rubber mat and crank through the machine.
3. Stencil: Remove the Plate B and rubber mat. Pop out the embossed diecut piece and remove the wax paper. Return the diecut piece to the diecut. Flip it over and lay it on the work surface. You will see the raised (embossed) areas only through the 'stencil.' Now you'll decide how you're going to decorate the raised areas. For both the gingerbread men and candy cane, I colored the raised areas with a Coconut White Uniball Signo Pen and it worked great through the raised areas of the stencil!
It's just a matter of assembling the card beginning with a 5-1/2x4-1/4 inch kraft cardstock panel (A Muse). I dry embossed it using a Dreamweaver Plaid stencil. The red and blue panels were affixed and then edge distressed (Prima Tool) before affixing onto the kraft cardstock with 3M Scotch 1/4" ATG tape. The gingham check May Arts ribbon was tied in a double bow.
The red/white cording (May Arts) was coiled over the red chevron with a few buttons (A Muse) threaded onto the cording. The gingerbread men were mounted over the cording with 3M foam mounting tape. On the right side, a diecut label (my stash) was embossed with Stampendous white embossing powder onto kraft paper (A Muse) and distressed with Vintage Photo ink (Ranger) and held in place with a tiny clothespin (A Muse). The Spellbinders candy cane was mounted onto the tag and a sweet punched heart (Marvy) on glitter paper (craft store) was mounted onto the candy cane. The edges were curled up and Stampendous Encrusted Jewels were heated from underneath to add extra pizzaz.
I hope you enjoyed my Christmas card today! Before you go, I'd love you to leave me a comment. Thanks for stopping by!
Stampendous Blog
Tenia Nelson
Lyn Bernatovich
Laura Drahozal
Janelle Stollfus
Lea Kimmel
Asia King
Spellbinders Blog


 RSS Feed