Lyn's Paper Petunia
  • Home
  • CHALLENGES/COLOR INSPIRATION
  • E-NEWS
  • STAMPENDOUS
  • TEMPLATES/TUTORIALS
  • WATERCOLOR
  • About
  • Contact
  • Untitled

Stampendous/Linnie Blooms Collaboration - Final Day!

5/29/2015

11 Comments

 
Picture
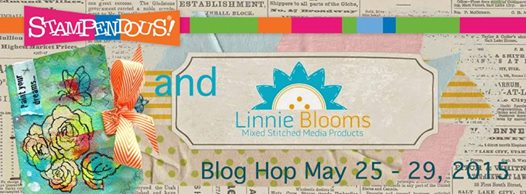
Linnie Blooms,  Stampendous AND Dreamweaver!  What a fantastic combination!  Here's hoping by this final day you've found oodles of fun projects to really take your mixed media in a new direction.  Of course there are prizes for 3 lucky winners!  Just click on the Stampendous link HERE for details.

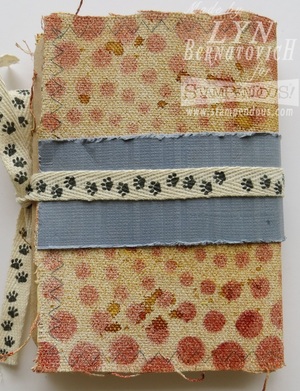
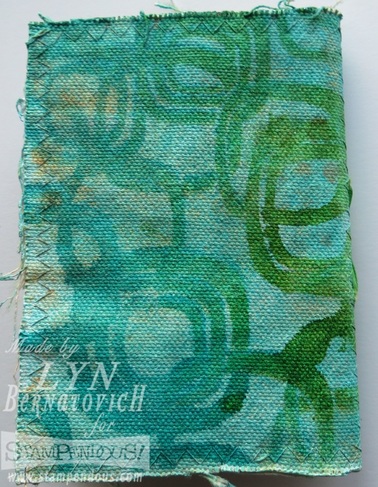
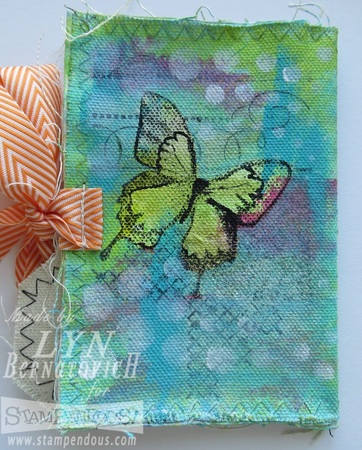
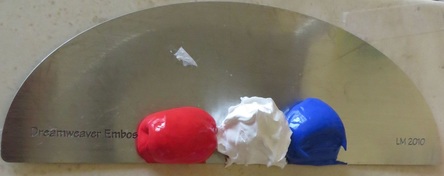
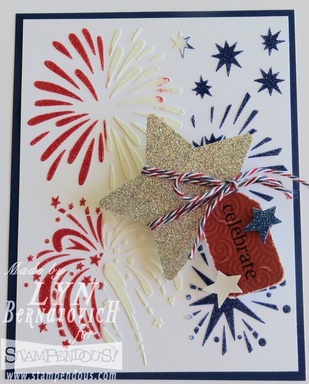
My project today features all three companies!  The Linnie Blooms canvas file folder was Gessoed on both sides first.  Next, I sprayed Memories Mists Pale Ale and hit it with a heat tool.  I folded the folder in half and laid the Dreamweaver Graduated Dot Stencil (that I can't stop using!) over the canvas and sprayed Memories Mists Iced Coffee with great results!  Before I cleaned the stencil, there was wonderful puddles of paint on it so I smooshed cardstock over it to pick up the reverse (negative) stencil design.  That piece went into my scrap drawer.  I repeated the process for the back cover.

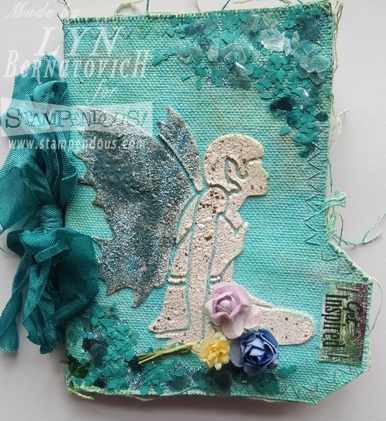
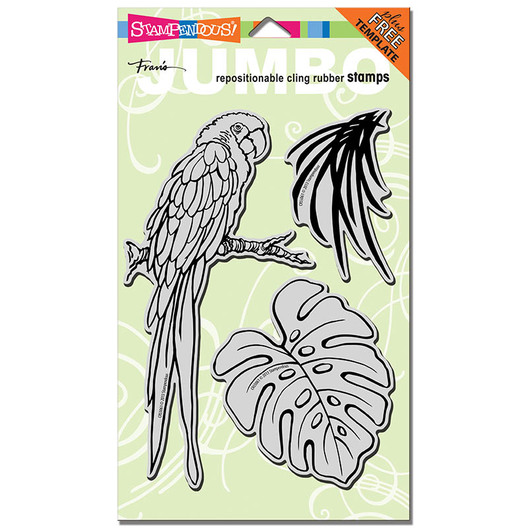
Once I had my base design done, it was a matter having fun creating the cover design with my little puppy!  When I saw the Stampendous Pop Up Puppies, the Coordinating Die Set AND the Dog Sayings, I had to have it all!!!  I knew I wanted to use the puppy head and its paws without the body.  I had a leftover scrap from the sprayed inside covers which became the rectangle piece to anchor the puppy.  It's hard to tell, but the reverse Pop Rectangles Stencil is smooshed onto the cardstock.

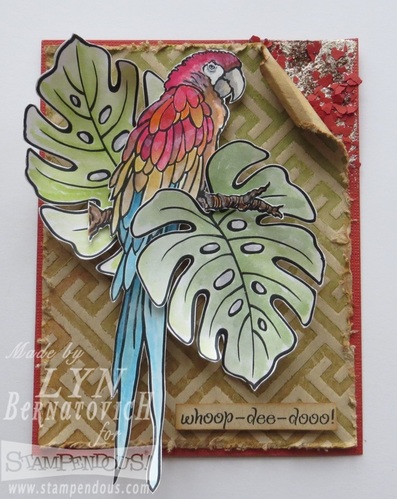
My puppy's head is mounted onto an Action Wobble!  The heart (Paper Shapers punch) is affixed to his mouth so the whole thing jiggles in the cutest way.  Puppy was stamped (Archival) on Kraft cardstock (A Muse), colored with Prisma Pencils and edged with Distress Vintage Photo.  Dreamweaver diecut letters and paper strip from Bazil paper.  Paw twill (May Arts).  Sentiment Stampendous Dog Sayings (love this clear stamp set!)  Adhesive used to affix twill and paper strip to canvas (Beacon Fabri-Tac).  Adhesive to attach heart and paws (Beacon 3-in-1)  The dog bone was stamped onto a left sprayed scrap and diecut.

Bo is our chocolate lab and he is 11 years old now, but he looked a lot like this puppy when we brought him home!  Even though my mini book isn't finished on the inside, I plan to create a photo journal of our dog for our son.
Picture
Back Cover
Picture
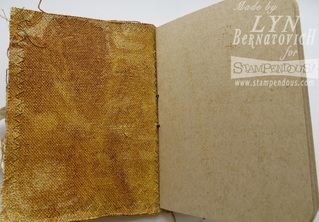
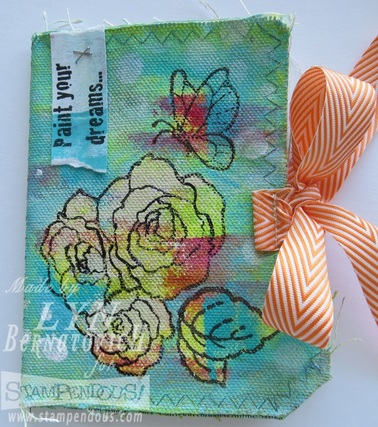
Inside cover and first page. All pages are kraft cardstock (A Muse). Inside covers were sprayed with Memories Mists Pale Ale. A Dreamweaver Pop Rectangles was laid over and sprayed again. The canvas wasn't completely dry and the detail distorted, but I'm totally okay with it.
Picture
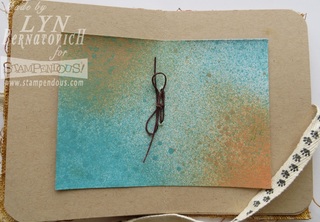
Center pages showing how I tied the wax string that holds the pages together.
Picture
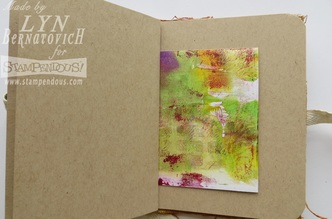
Insert pieces were from leftover book pages. They are cut in half and go in between each page of kraft paper.
 Thank you for stopping by!  Be sure to leave a comment for a chance to win!

Stampendous Blog

Amy Hurley-Purdie

Louise Healy

Janelle Stollfus

Wendy Price

Pam Hornschu

Jamie Martin

Laura Drahozal

Kristine Reynolds

Tenia Nelson

Lyn Bernatovich

Pam Bray

Lea Kimmel

Linnie Blooms Blog

11 Comments

Stampendous/Dreamweaver/Linnie Blooms - Day 4

5/28/2015

8 Comments

 
Linnie Blooms,  Stampendous AND Dreamweaver!  What a fantastic combination!  Here's hoping by Day 4 you've found oodles of fun projects to really take your mixed media in a new direction.  Of course there are prizes for 3 lucky winners!  Just click on the Stampendous link HERE for details.

My Dreamweaver focused interpretation used one of my absolute favorite stencils...the Fairy.  After adding a few layers of acrylic paint (drying in between), I decided to go with stenciling the Fairy right onto the canvas cover.  I used Dreamweaver Regular Embossing Paste and while wet, sprinkled Stampendous Encrusted Jewels Kits - Teal on the wings and Pink on the fairy.  Each section was heated with a heat tool (separately) from underneath until it melted sufficiently.  Clear glue was applied to the upper right and lower left corners and Teal fragments were sprinkled into the glue.  I laid a piece of cardstock over the fragments and pressed over the glue and and let it dry.  A scrap piece of painted paper was stamped using the Stampendous  Eclectic Charms clear stamp set and Versafine onyx black ink.  Tiny attachers (Tim Holtz) affixed the sentiment in place.  Flowers from my stash (Prima, Paper Mart) were hot glued in place.  Two holes were pierced through the pages and the spine of the canvas mini and tied with seam binding (Hug Snug).  I literally tried 8 different ribbons until I finally felt satisfied with the ribbon color against the painted canvas!  It is a double piece of ribbon and is scrunched with a few spritzes of water.
Picture
I love the final result of the back cover!  It went through several layers of acrylic paint (that I wasn't happy with) and I finally laid the Dreamweaver Pop Rectangles Stencil over the canvas and spritzed Memories Mists Blue Lagoon over the stencil.  I lifted the stencil off and saw a hole where the green color now is, so I cleaned the stencil and laid it back down and sprayed Memories Mist Kiwi just into the area where the hole was and voila!  I'm doing a happy dance!
Picture
Finally, I couldn't resist adding pages to the Fairy mini although they aren't finished on purpose.  Here are more papers from the Stampendous Creative Palette Rectangles acrylic painting fun I had that are the perfect size for each page.  The flip side of the Creative Palette papers were sprayed with Memories Mists.  All I did was cut the pages down a bit which gave me some terrific leftover pieces to stamp on.  I had the Stampendous Cling Beautiful Life previously embossed in gold on vellum in my stash and thought it worked beautifully for my first page.
 I hope you enjoy my project today and that it inspires you to play with canvas, paints, Stampendous stamps, Dreamweaver products and your scraps!  Be sure to leave a comment for a chance to win! 

Stampendous Blog

Amy Hurley-Purdie

Wendy Price

Pam Hornschu

Laura Drahozal

Alison Heikkila

Tenia Nelson

Lyn Bernatovich

Louise Healy

Kristine Reynolds

Linnie Blooms Blog
8 Comments

Stampendous/Linnie Blooms Collaboration - Day 2

5/26/2015

23 Comments

 
Picture
Linnie Blooms and Stampendous...what a fantastic combination!  You're going to find oodles of fun projects to really take your mixed media in a new direction.  Of course there are prizes for 3 lucky winners!  Just click on the Stampendous link HERE for details.

Here's my interpretation of this totally fun canvas folder!  Front and back covers were painted with various acrylic paints from my stash.  Once dry, I stamped Stampendous Build A Bouquet (CRS5074) with Versafine Onxy Black.  I created a wash of acrylic paint and proceeded to paint over the entire background with the exception of the flowers and butterfly (back cover).  For a fun effect, I laid a Dreamweaver Spiral Dots (DW7029) over the open canvas and sponged white acrylic paint into the dots.  Ribbon (May Arts) was machine sewn into the canvas.  Staples (Tiny Attacher, Tim Holtz).
Picture
This is the biggest little project packed with tons of product and was fun to create.  The mini book is by no means finished, but because there's so much to see in each of the additional booklet pages, I made a slideshow.  Some of the pages were created with Stampendous Creative Pallet Rectangles that includes two very cool stamp images that were also used.  The other pages were sprayed with Memories Mists.

With the leftover scraps, I stamped Stampendous Journal Lines (SSC1205) and added bits to various pages.  I also cut up the Stampendous Life is Art that worked beautifully with the pages.  Scraps of previous Dreamweaver papers from my stash were also used.  The photo of me is from the 80's when I used to own an aerobics company called Aerobics by Lyn.  It's actually how I met my husband who came to a class!!!  The Dreamweaver Petite Fern Die was leftover from my stash.  Pages 7,8 used the Stampendous Mixed Media Cling Rubber Motif Stamp (CRS7003).  On pages 3 and 12, I laid the Dreamweaver Quatrefoil (LX7010) over the sprayed paper and re-sprayed again revealing a shadow-like effect. The pages were sewn together into the canvas folder.  For reinforcement, I taped each page with washi tape (A Muse).
Picture
 I hope you enjoy my project today and that it inspires you to play with canvas, paints, Stampendous stamps, Dreamweaver stencils and your scraps!  Be sure to leave a comment for a chance to win! 

Stampendous Blog

Lyn Bernatovich

Pam Hornschu

Janelle Stollfus

Linnie Blooms Blog

23 Comments

Stampendous/Dreamweaver - Patriotic Birthday!

5/23/2015

6 Comments

 
Picture
Balloon (LG669); Confetti (LJ854)
Today I'm showing you a Stampendous/Dreamweaver patriotic birthday!  I'm sure having fun creating with red/white and blue colors.  
A few week's ago, I used the first pull of my paste spreader to create red, white and blue stripes and this card used the middle and last pulls!  Here's the link to that post.  The middle pull was for the Confetti (LJ854) stencil and the last pulls were spread over the Balloon (LG669) a few times resulting in a tie die look!  While the confetti paste was wet, I sprinkled crystal glitter from my stash and let that dry completely.

Because the balloon is large, and once it was dry, I pasted the Graduated Dot (DWLX7029) stencil with Glossy White Paste (DGWP) and set it aside to dry.  

Another tri-color pasting I did with the original amount of paste on my spreader was with the Chevron Stencil (LX7026).  The little tiny corner piece on the Birthday sentiment is from that pasting.  The cool curly string is red crotchet thread that I covered with multi medium glue (any clear drying glue will work).  I just dipped my finger in the glue and spread it all over the string.  I laid it down on a craft mat and using a non stick tool, arranged it in curly cues and let that dry completely.  Meanwhile, I tied a bow around the bottom of the balloon and hid the ends behind the balloon.

The Stampendous sentiment is Birthday Assortment (SSC1115) from the Perfectly Clear Stamps set.  It is stamped with Versafine Onyx Black ink.  The little star twinkles and papers are from A Muse.

Hope you enjoyed my card today!  Before you go, I'd love you to leave a comment.

Lyn
6 Comments

Stampendous/Dreamweaver - Picnic Fun Friday!

5/22/2015

4 Comments

 
It's the final day of Stampendous/Dreamweaver's Picnic Fun theme!  My card almost looks like a baby card with its soft yellows and blues, but the Hoppy Moments (SSCM5001) bunny flying the kite just screamed an afternoon picnic activity.
Picture
A card design has to start someplace and mine began with the Stampendous image that was stamped with Versafine Onyx Black (STS082) along with the sentiment.  The image was colored with Peerless Watercolors.  The background sky was a mix of Folk Art Calypso Sky acrylic paint, Golden Gel Medium and some water to thin out the color here and there.  Clouds were created with my trusty Dreamweaver Picasso tool (DWLL332), a 1/4" stencil brush and Splendor ink.  Tiny Stampendous vinyl stickers were added to the kite string.  The image was diecut with a stitched circle from Lawn Fawn.  The edge was distressed with a distressing tool (Prima).  Ribbon (May Arts), Stampendous Fragments (Powder Blue), miscellaneous button.  Papers:  Stampendous Mixed Media (MPW811), A Muse Studio.  If you look closely, you'll see the dry embossed Dreamweaver Checkerboard Stencil (LJ803) for the background panel.

Hope you enjoyed my fun picnic themed card today!  I'd love hearing from you before you go.

Stampendous Blog

Amy Hurley-Purdie

Louise Healy

Lea Kimmel

Kristine Reynolds

Lyn Bernatovich (That's me!)
4 Comments

Stampendous/Dreamweaver - Picnic Fun!

5/21/2015

5 Comments

 
It's Dreamweaver Stencils at Stampendous today and I've got two Throwback Thursday cards that perfectly fit the Picnic Fun theme!

Picture
LL 3032 Cherries
The checked border and gingham ribbon (May Arts) give this card that picnic feel.  The cherries used the double glitter technique with glitter I had on hand at the time (US Artquest) back in 2013.  Don't know if you can tell but the branch was filled in with embossing powder!  The pins were had decorated by me.  (I love making up a bunch of pretty pins on a rainy afternoon!)  Tag (McGill punch), sentiment (A Muse).
Picture
LG 654 Pitcher, LL 3032 Cherries, LS B
I love the story of this pitcher and I hope you'll indulge me while I tell it again.  When I attended the Dreamweaver Certification in 2013, the very first challenge we were given by Lynell was to 'do something' with the pitcher stencil.  I sat there staring at this stencil with a hole in it without an ounce of creative mojo.  I couldn't help looking over at some of the other people in the class and there's Pam Hornschu, who was assisting Lynell in the certification, creating an amazing pitcher!  Needless to say, the most I could do was color it yellow with a stencil brush.  The exercise was for Lynell to get an idea of what we knew about stenciling.

After the certification, I brought my pitcher home and was determined to do something with it.  Awhile later, we had a challenge on the Dreamweaver team and I was finally able to take out my poor little pitcher and finish it.  I love this card, the crackled pasted cherries colored with Splendor inks, the monogram stencil, all the Graphic 45 elements, ribbon (May Arts) and doily (A Muse).  

The message here is to put something aside and pick it up later with fresh eyes and thoughts and let the stencil speak to you, 'cuz it will eventually!

Here's the links for today, but leave me a little love before you go!

Stampendous Blog
Laura Drahozal 
Lyn Bernatovich (That's me!)
Louise Healy
Pam Hornschu
Kristine Reynolds
Alison Heikkila


5 Comments

Stampendous/Dreamweaver - Week 2!

5/14/2015

10 Comments

 
Today's Dreamweaver Thursday theme is 'two birds with one stone,' which fit perfectly with our Team Manager, Laura Weed's challenge to create a project using the Cling Jumbo Parrot Rubber Stamp set!!  Of course, we took her up on the challenge!!!  The beauty of Stampendous is you can order directly from their website.  There's also the collaboration going on this week with Stampendous and Clear Scraps!  Whew!  

Here's the challenge cling set and my card design:
Picture
Picture
There are several components to my card (does that surprise you?) and I'll start at the beginning with the parrot.  Unless you own a parrot, I would guess knowing how to color a parrot is something of a mystery.  Thank you Pinterest and Google!!!!  

The parrot and leaves are colored with Tombow Markers scribbled onto Palette Paper (you can use an acrylic block or anything with a slippery, non porous surface).  One reason I prefer Palette Paper is because it is white and I get a true visual of the color I'm working with.  Tip:  If you are using an acrylic block, lay a piece of white paper underneath and you'll get a much better color representation.  I spritz a little water near my work area and pick up color and water as I work along.

So I found my parrot image to use as a reference and began painting it basically from 'head to toe.'  The Tombow Marker colors I used are listed at the the end of this post. 

The parrot needed a background and Dreamweaver to the rescue!  I used the Letterpress Technique on the I-Beam Stencil (LX7028) with Dreamweaver Memory Mists (Wheat Grass, Iced Coffee, and Bright Gold).  Letterpress basically follows the same steps as dry embossing with the exception that the stencil is lightly sprayed first with with 2-3 colors of Memory Mists (or similar product).  I use a hand made paint box just to keep the spray contained.  Carefully lift the stencil by the edges and place on the embossing platform.  Just as you would for dry embossing, next comes the paper to be embossed, the rubber mat and two embossing plates (if using the Sizzix Big Kick), and start cranking.  The results are so cool and, honestly, are always different.  You have to be okay with random results!

I Love texture, so the top right corner was curled down to reveal the base cardstock panel (Core'dinations) paper where I added embossing power from the Stampendous Encrusted Jewel Bronze Kit (EJK07) and Stampendous Scarlet Color Fragments (FRC11).

The sentiment is from Stampendous Clear Birthday Wish Set (SSC1115) which was stamped with Versafine Onyx Black on Kraft paper (A Muse) and edged with Distress Vintage Photo.  
Tombow Markers Used:  
N55, 899, 947, 933, 993, 025, 126, 158, 905, 847, 845, 526, 443, 476

Hope you enjoyed my card today!  Before checking out the rest of the team's posts, I'd love you to leave me a comment!

Stampendous Blog

Louise Healy
Pam Hornschu 
Laura Drahozal
Lyn Bernatovich (that's me!)
Kristine Reynolds
Jamie Martin
Alison Heikkila

Clear Scraps Blog
10 Comments

Stampendous/Dreamweaver - Week 1

5/6/2015

9 Comments

 
The theme this week at Stampendous is PATRIOTIC and the first color pallet we think of is red, white and blue, of course!  As I was thinking about how I would create a Dreamweaver card using this theme, I had an idea that started something like, "hmmmm, I wonder if this would work."  Basically, I was flying blind, but I took a few work-in-progress photos anyway just in case my idea worked.  I usually don't take progress photos when I'm creating something totally new to me, as I think it's bad mojo, but I wanted you to see the process in case things did work for this card.  

I'm happy to say that this technique worked and here is my card for today:
Picture
Picture
Here's the pasted stencil before I removed it from Neenah Solar White cardstock.  Amazingly, I only had to pull the paste once, which is how I got such clean color divisions.
Picture
Fireworks (Lj886)
To achieve a crisp red, white and blue pasted image without smudging (that's another technique), I lined up the Dreamweaver Glossy Red, Glossy White and Glossy Blue pastes evenly along the edge of the Paste Spreader (LM2010) using the Pallet Knife (1385).  Wish you could see this in person as it is colorful, bright and sparkly.
Notice the pastes are barely touching.  In hindsight, this was way too much paste, so rather than toss it or throw it in a 'sludge pot,' I kept pasting other stencils until I used it all.  Stay tuned for those results!
While the paste was still wet, I sprinkled crystal ultra fine glitter from my stash.  The stars were punched with Marvey punches from glitter paper (craft store) and the tag was punch with a McGill punch and a scrap of red cardstock from my stash.  It was stamped with the Stampendous Perfectly Clear Stamps Birthday Assortment (SSC1115) set.  I dry embossed the tag using the Dreamweaver Swirls Stencil (LJ863) to give it some texture.  

Here's a cool design tip:  When there is a busy background as on this card, ignore it when adding embellishments.  The background can interfere with our desire to add dimensional pieces, so pretend the background is plain.  It's a neat trick that I teach and it takes the stress out of to add or not to add embellishments.   The silver star is mounted with an Action Wobble Spring.

Here is the Design Team list for today.  I'd love your comment before you go!

Stampendous
Lyn Bernatovich (That's me!)
Louise Healy
Alison Heikkila
Pam Hornschu
Laura Drahozal
9 Comments
    Picture

    So glad you're here!

    Subscribe to our mailing list

    * indicates required
    Email Format
    Picture
    Click on above card for CHALLENGE SITE LINKS
    Picture
    Picture
    Picture
    Picture
    The Color Throwdown
    Picture
    #TGIF222 - Let's Shake it Up!
    Picture
    Picture
    Picture
    Picture
    Picture
    Picture
    Picture
    Picture
    Picture
    Picture
    Picture
    Picture
    Picture
    Picture
    Picture
    Picture
    Picture
    Let's Have S'More Challenge Winner #81
    Picture
    Muse: Christmas Visions Challenge #109
    Picture
    Muse Challenge #276, #277, #282, #287
    PictureChallenge #85 - Rustic Blooms!

    Picture
    Challenge #70 - Purple Haze Fluid Watercolor Butterfly!
    Picture
    Challenge #69 Rich Texture
    Picture
    Picture
    PictureI am a certified Dreamweaver Instructor

    Archives

    August 2022
    July 2022
    June 2022
    April 2022
    October 2021
    September 2021
    July 2021
    December 2020
    November 2020
    October 2020
    August 2020
    June 2020
    March 2020
    February 2020
    January 2020
    November 2019
    October 2019
    September 2019
    August 2019
    July 2019
    June 2019
    May 2019
    January 2019
    October 2018
    September 2018
    August 2018
    July 2018
    May 2018
    March 2018
    February 2018
    January 2018
    November 2017
    October 2017
    September 2017
    July 2017
    June 2017
    May 2017
    April 2017
    March 2017
    February 2017
    January 2017
    December 2016
    November 2016
    October 2016
    September 2016
    August 2016
    July 2016
    June 2016
    April 2016
    February 2016
    January 2016
    November 2015
    October 2015
    September 2015
    August 2015
    July 2015
    June 2015
    May 2015
    April 2015
    March 2015
    February 2015

    Categories

    All
    #altenew
    #alwaysfunchallenges
    #A Muse Studio
    #andy Skinner
    #CAS
    #CASonFriday162
    #Creatime
    #doodle
    #DreamweaverStencils
    Dreamweaver Stencils
    #DWStencils
    Faber Castell
    Faber-Castell
    #Fall
    #FMS389
    #freshly Made Sketches
    Fun Stampers Journey
    #Geli Arts
    #happylittlestampers
    HSSSC#317
    #inspiredbylaurel
    #Koi Watercolor Paints
    #makethecardschallenge
    #May Arts
    #Mixed Media
    #penny Black
    #seizethebirthday
    #shoppingourstash
    #sketched Cards
    #somethingnew
    #spellbinders
    #Split 4 Stamping
    Stampendous
    #Stampendous
    #stb171
    #the Card Concept
    #THEMAILEROOM
    #timholtz
    #Tombow
    #watercolor
    #Zig Clean Color Real Brush

    RSS Feed

Proudly powered by Weebly