
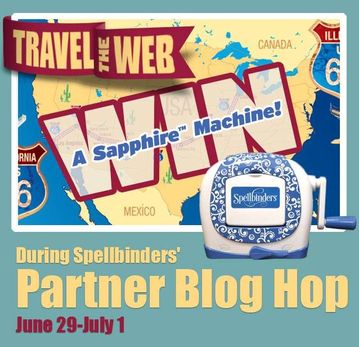
It’s summer time and we are hopping with some fabulous companies in the Summer Road Trip Partner Hop with Spellbinders.
Stampendous Stamps is hopping all three days with some fabulous summer inspiration from the design team and on Wednesday two of our designers will be featured a tutorial with some new Spellbinders products! How fun is that!
Prizes! Spellbinders is having a great giveaway during this hop with three daily winners and one grand prize winner! Check out the details here.
I'm having so much fun with the Spellbinders Die D-Lite Shapeabilities! Today's project is a sweet Christmas tag. Read on to learn how these little cute dies work.
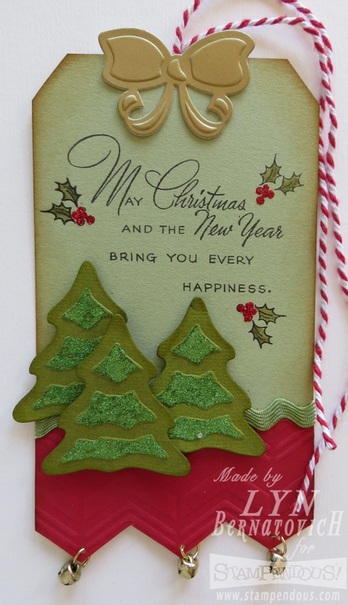
There are 3 steps to creating a finished Shapeabilities diecut shape. My directions use the Spellbinders Grand Caliber machine.
1. Diecutting: Lay the die near the edge of Platform A with the cutting side face up. Lay a piece of wax paper over the die. Lay your cardstock over the wax paper. Place Cutting Plate B over the paper and diecut.
2. Emboss: Remove Cutting Plate B. Remove the negative portion of the diecut paper and leave the rest in place inside the die. Place the rubber mat over the die. Place the Embossing Plate over the rubber mat and crank through the machine.
3. Stencil: Remove the Embossing Plate and rubber mat. Pop out the embossed diecut piece and remove the wax paper. Return the diecut piece to the diecut. Flip it over and lay it on the work surface. You will see the raised (embossed) areas only through the 'stencil.' Now you'll decide how you're going to decorate the raised areas. For the Christmas trees, I just used my Quickie Glue Pen and Stampendous Sea Green ultra fine glitter.
For the bottom red border, I dry embossed a piece of Bazill cardstock with the Dreamweaver Chevron Stencil. I used my Sizzix Big Kick and made a 'sandwich' stack as follows: platform with no tabs, stencil, cardstock, rubber mat, 2 cutting plates and cranked it through. I simply followed the chevron pattern to cut the bottom border. Holes were punched with a 1/8" hole punch, tiny jingle bells (A Muse) were inserted onto jump ring and mounted on the tag.
For the body of the tag, I cut Bazill cardstock 3-1/2" x 5-1/2". Stampendous Christmas Wishes Perfectly Clear stamp was inked with Versafine Onyx Black and stamped onto tag. The sweet little holly images that are part of the set were stamped also with Versafine Onyx Black. The leaves were colored with Copic Olive and the berries were colored with Copic Crimson then covered with Quickie Glue Pen and Stampendous Ultra Fine Red Glitter.
The bow was diecut on gold (A Muse) cardstock. I thought it was pretty as is and didn't add any stencil decorating to it. It is mounted with a foam square (Scrapbook Adhesives). Red/White cording (May Arts) was hot glued onto the back side of the tag.
The red Dreamweaver Stencil Chevron panel was affixed to the bottom portion of the green tag with a 3M Scotch ATG 1/4" tape runner. The ric rak (May Arts) was affixed with Scor-Tape (Scor-Pal). Finally, the trees were added with foam squares (Scrapbook Adhesives). For added depth, I distressed the edges with Vintage Photo Distress Ink and a blending tool (Ranger).
Hope you enjoyed my little Christmas tag today! Before you go to the next designer's blog, I'd love you to leave me a comment and thanks for stopping by!
Stampendous Blog
Amy Hurley-Purdie
Lyn Bernatovich
Pam Bray
Alison Heikkila
Spellbinders Blog
Stampendous Blog
Amy Hurley-Purdie
Lyn Bernatovich
Pam Bray
Alison Heikkila
Spellbinders Blog


 RSS Feed