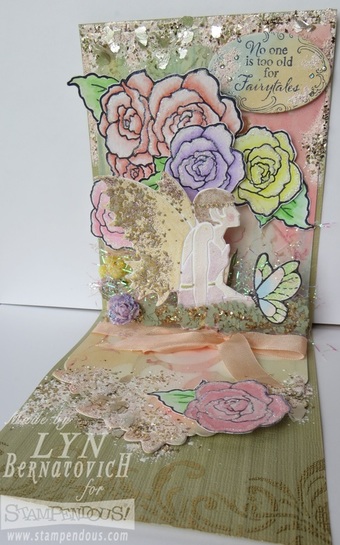
Here's the finished project:
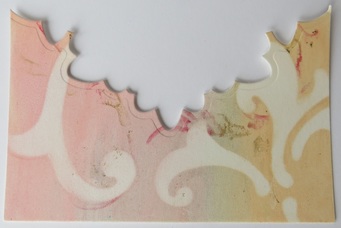
Starting with a gessoed 8-1/2x11 mixed media cardstock, I cut the panel to the specified size. TIP: Spray Krylon Gesso Spray outside (bad fumes!) 'cuz I want that part done fast using my handy-dandy home-made large spray paint box. I was going for soft and dreamy colors of Gelatos and scribbled one color at a time and blended with my finger. I touched the piece with a heat tool in between layers. The next layer was to stamp a Stampendous image that was colored with Gelato and spritzed with water. I love this technique because one Gelato colored image goes a very long way. Unfortunately, you can't really see it in the photo below, but it is the specks of darker color. Finally (my fav part!), I grabbed a baby wipe and a stencil from the Stampendous Filigree set, and wiped into the stencil open areas to remove color! Voila!
Here's a leftover scrap which gives you an idea of the design.
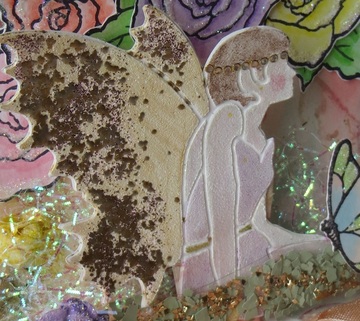
Notice the sage fragments in front of the fairy? That is an acrylic piece I cut and hot glued to the fairy. The Stampendous Build A Bouquet Butterfly and flower (Paper Mart) are also affixed to the acrylic. A ribbon (Hug Snug) was tied around the bottom panel to help fill in open space.
Before affixing the inner panel to the outer panel, I dry embossed the outer panel with the Dreamweaver Plaid stencil. To pretty up the bottom edge, I embossed the Stampendous Cling Filigree Stamp with Versafine ink and Stampendous Gold ultra fine embossing powder. Once all the pieces were assembled onto the inner panel including the Stampendous Timeless Fairytales Sentiment, I added Pink Encrusted Jewels to the top and bottom to add more texture and excelsior (my stash) to add more dreamy fantasy.
Hope you like my little diorama today! It is time to hop to the next designer's blog but before you go, I'd love you to comment. Thank you for stopping by!
Stampendous Blog
Jamie Martin
Pam Hornschu
Lyn Bernatovich (that's me!)
Kristine Reynolds
Laura Drahozal
Louise Healy




















 RSS Feed