
Welcome to another card tutorial featuring A Muse Studio Stamps and supplies! Today we're using a portion of a stamp that is typically called "partial stamping." There's a second trick on the card that doesn't really have a catchy name, but could fall under partial stamping as well.
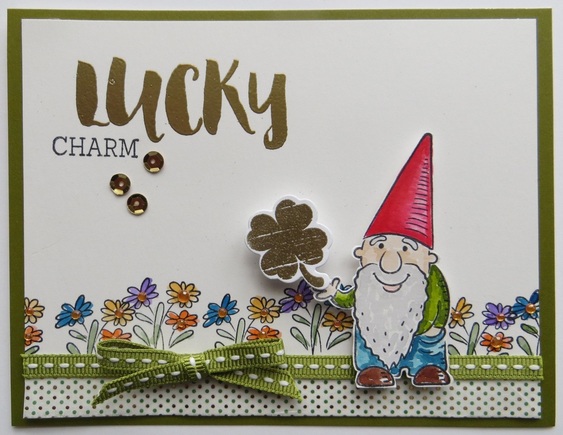
Here's the finished card:
Here's the finished card:
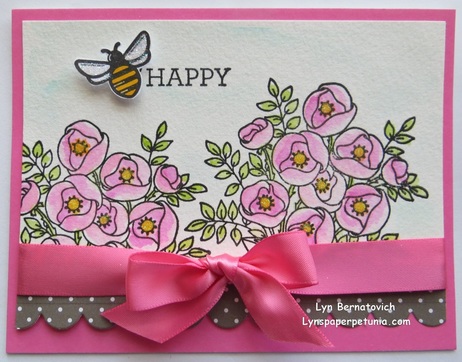
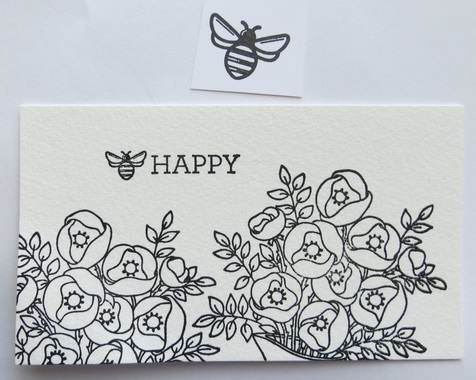
Bouquet of Love is from July's Monthly Collection. You would never guess there's a large pitcher underneath the flowers! Bee Happy sentiment actually has a smaller bee in front of Happy that is part of the stamp. I liked the larger bee and mounted it right over the smaller bee!
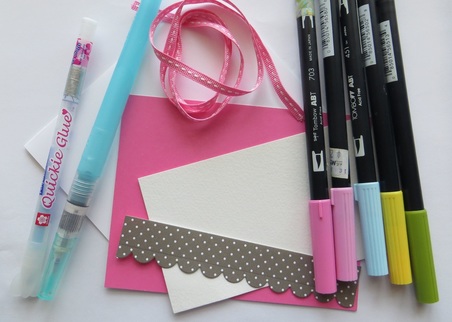
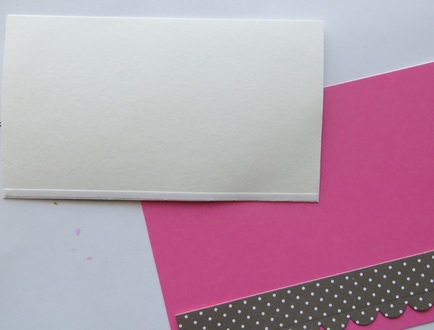
Here is a photo of supplies you'll need to get started:
Here is a photo of supplies you'll need to get started:
Cut a card base 5-1/2 x 8-1/2 and score at 4-1/4
Cut a Bubblegum panel 5-1/2 x 4-1/4 an affix to card front
Cut watercolor paper (or Sugar cardstock) 3 x 5-1/4
Diecut the Medium Scallop Border Die onto a scrap of Slate Dot cardstock 1 x 5-1/4
The Bubblegum stitched ribbon in the photo was not used. Instead, I used Bubblegum Satin Ribbon cut at approximately 25". Of course, you could save ribbon and tape it just over each edge rather than wrap around.
Assorted Tombows
Versafine Onyx Black Inkpad
Quickie Glue Pen
Waterbrush
Scor-Tape or similar (I used 1/8")
Tape Runner
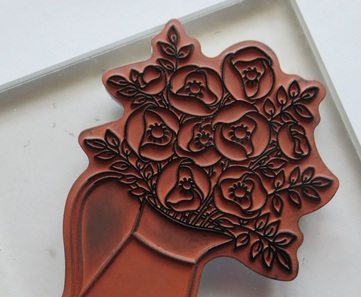
1. Ink the flowers with Versafine Onyx Black (avoid inking the vase).

2. Stamp the first image as shown.
3. Stamp the second image over to the left and slightly lower than the first stamped image.
4. Stamp the sentiment as shown.
5. Stamp the larger bee on a scrap of cardstock. Refer to the finished card for coloring. Fussy cut out if you don't have the matching die. Apply Quickie Glue Pen to the wings and Diamond Glitter. Mount onto card with foam tape to add dimension once the card is completely assembled.
6. Refer to finished card for coloring reference. I scribbled Tombows onto an acrylic block and picked up color with a waterbrush. No need to be too fussy here, especially if you're using Sugar cardstock as you don't want the paper to become too wet.
7. Once the flowers are dry, add a wash of blue to the background.
8. Lay a length of Scor-Tape along the long edge of the flower panel. Lay the scallop in the approximate area it will be on the card. Remove the Scor-Tape release layer and line up the panel over the scallop border being careful to get it on straight.
9. Wrap ribbon around the scallop/floral panel and tie in a bow. Affix to the Bubblegum card front.
10. Mount the large bee in place with foam mounting tape.
Now it's your turn! I think it would be fun to create this same card in yellow, orange, blue, red, or purple. I can't wait to make more of these in other colors!
xoxo,
LYN
 RSS Feed