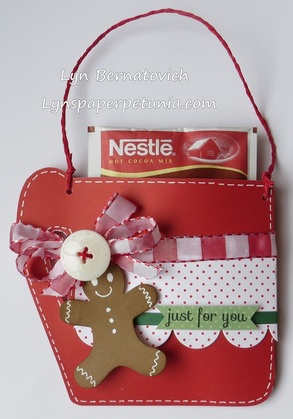
This little project is so addicting and every year I come up with a different design! The ribbon wraps around the mug and ties in the front. The dotted and green strips are folded in half and affix to the front and back without completely wrapping. Faux stitching was created with a White Uniball pen.
The pocket size is great for tucking in all kinds of little goodies from packets of coffee, tea, spices, bars, candy, etc.
What's great about this project is it isn't confined to just Christmas and holidays. Wouldn't this be a fun little girls birthday party idea? Or a Sunday school, Girl Scouts, or after school project?
I'd love to hear about the projects you've made!
P.S. I've had this pattern for many years and I apologize to the person who originally posted it as I no longer know where I found it.
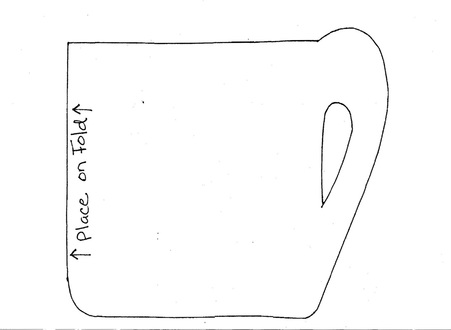
MUG PATTERN
Two mugs will fit on one 8-1/2x11 sheet. To help you print the pattern, just click on the mug and save. Printing dimensions from top to bottom: 4-5/8"; Side to side, excluding the handle: 4/-1/4"
The trickiest part of cutting the pattern is cutting the opening in the mug handle. To make that easier, I punch a few 1/4" holes just to make a big enough area to get my scissors in there.
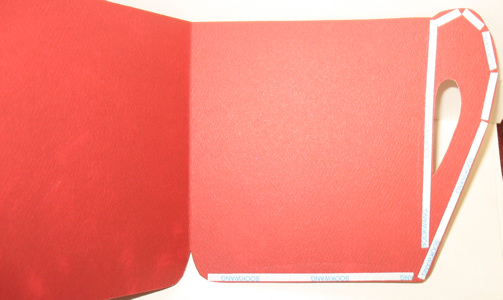
TAPING DIAGRAM
The trickiest part of cutting the pattern is cutting the opening in the mug handle. To make that easier, I punch a few 1/4" holes just to make a big enough area to get my scissors in there.
TAPING DIAGRAM
To affix the mug halves together, apply Score-Tape, Red Line tape or a tiny stream of Tombow Multi Purpose glue to the bottom, mug handle and the other side of the handle.
I've always liked making a handle by punching two small holes at the top of the mug. That is an optional step.
As for the design and decoration, I will leave that up to your own limitless creativity!
Enjoy!
LYN
I've always liked making a handle by punching two small holes at the top of the mug. That is an optional step.
As for the design and decoration, I will leave that up to your own limitless creativity!
Enjoy!
LYN


 RSS Feed